Showing posts with label Tutorial. Show all posts

19 August 2011

Dinner is Served: Quesadilla Casserole

Remember that awesome post that Blogger deleted back when it decided to crash a few months ago?? Guess what?!?! I found it. It just showed back up one day disguised as a draft. I decided since I didn't have nearly enough posts going on this week, to post it today. Hope y'all get to make this soon! :)

Original post date: May 17th, 2011 

I had quite a few ladies ask for the recipe for my Quesadilla Casserole. I cleverly omitted the fact that I didn't invent this. 

McCormick did...


But it's really good, so don't not try it just because I didn't come up with it. *ahem*. I got this for about $2 at Winn-Dixie. My Mama has been talking about how McCormick was coming out with these Recipe Inspirations for over a year now, but the Wal-mart in Springville doesn't have them. And Lord knows Mr. Burton isn't going to carry them. 

They're located on the spice aisle/baking aisle next to the other McCormick products. Our Winn-Dixie carries 6 different recipes. This is my favorite so far. (The Rosemary Chicken and Potatoes is really great too!) You can check out their other packets here.


Each packet comes with all of the pre-measured spices you'll need for each individual dish and a recipe card to add to your box. On the back of the package is a check-list of the other ingredients you'll need. If you don't plan on going and buying one of these, I'll go ahead and list the spices too. If any of you are like me, you don't use these spices everyday, so it's more beneficial to buy the spice packet. lol.

Ingredients

2 tsp. McCormick Chili Powder
1 tsp. McCormick Ground Cumin
1 tsp. McCormick Minced Garlic
1/2 tsp. McCormick Oregano Leaves
1/2 tsp. McCormick Crushed Red Pepper (optional)


1 lb. ground beef (you could use turkey too)
1/2 cup chopped onion
2 cans (8 oz. each) tomato sauce
1 can (15 oz.) black beans, drained and rinsed
1 can (8 3/4oz.) whole kernel corn, undrained**
1 can (4 1/2oz.) chopped green chiles, undrained
6 flour tortillas (8-inch)
2 cups shredded Cheddar cheese


Directions

1. Brown beef and onion in large skillet on medium-high heat;drain. Add tomato sauce, beans, corn and green chiles; mix well. Stir in all of the Spices except Red Pepper. Bring to boil. Reduce heat to low; simmer 5 minutes. Add Red Pepper to taste, if desired.
2. Spread 1/2 cup of the beef mixture on bottom of 12x9x2-inch baking dish sprayed with no-stick cooking spray. Top with 3 of the tortillas; overlapping as needed. Layer with 1/2 of the remaining beef mixture and 1/2 of the cheese. Repeat with remaining tortillas, beef mixture and cheese.
3. Bake in preheated 350°F oven 15 minutes or until heated through. Let stand 5 minutes before serving.
Seriously, let it stand 5 minutes. It thickens up then and it's easier to serve. Otherwise you'll have it dripping down the side of the stove. Or maybe that's just me. I am a klutz.


**Note: I couldn't find a can of corn this small, so I just used a regular-sized can. It works just as well. So don't waste a whole lot of time searching for a smaller can.

07 May 2011

Just call me Susie Homemaker...or just Whitney.

 Thursday I was feeling a lot better than I have been in awhile.
So I decided to get busy with some projects that have been sitting around 
the house longer than I have. *ahem*

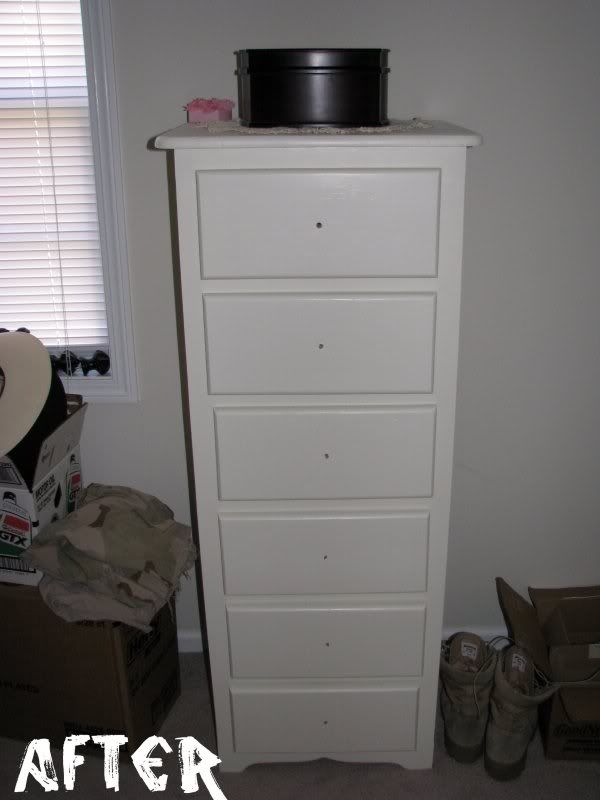
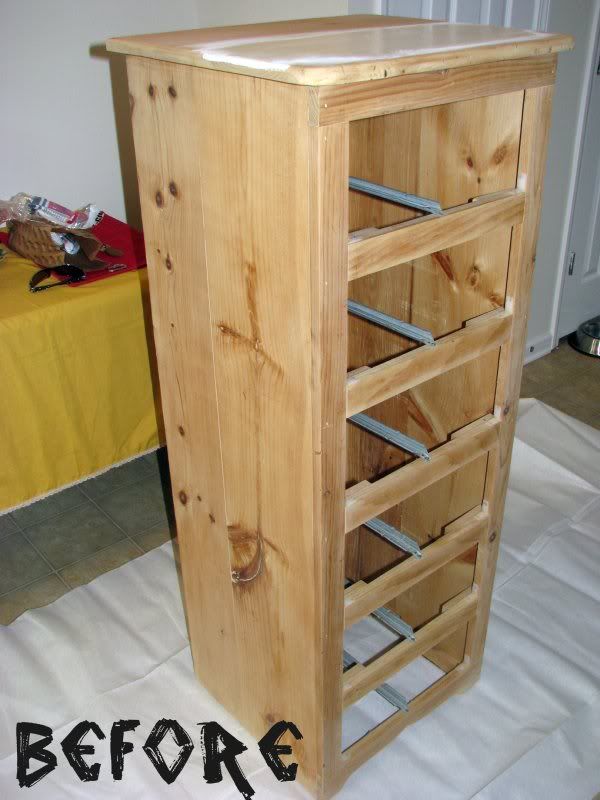
I started out by sanding the dresser tower I found sitting out by the
dumpster one day. They didn't want it! And there was nothing
wrong with it, other than the coloring on the drawers. 
(It was obviously a children's dresser. It still had little
girl pajamas and undies in the bottom drawer.)
It also had a piece of weave in it...gross.

After sanding the top and one side, the battery to the 
sander died. So I swapped the batteries and sanded the front and
the other side. I started sanding the third drawer and that battery died.
So, I had to wait several hours for the batteries to charge before I 
could finish. I cleaned out the plastic storage drawers
in the bedroom and unpacked two more boxes of 
picture frames and J's pajama shorts.

After reorganizing the bottom of the closet some,
so I could fit the plastic drawers storage thing in there,
I ran to the Dollar General to buy a cheese grater.
Why, you ask? To make my own homemade laundry
detergent, of course!

I got the idea from my friend, and fellow blogger, Holly.
(I think we're friends. We are friends aren't we Holly?...)
Anywho. She has 5 beautiful kiddos and she made 
her own laundry detergent. I figure if it's good enough for Holly's 
sweet babies, it's gotta be good enough for the Hubby and I.

I had already bought the supplies at Wally World (Holly bought hers at 
Pub-lick's for around $8.) on the Laundry detergent aisle, but when I got
home to make it, I didn't have a cheese grater! I don't know how that
happened. We've been married almost 3 years and we both love
 cheese. I know I've even bought block cheese before. Apparently,
we just ate the block whole...

SO...I keep getting side-tracked... When I got back from the DG,
the batteries were charged, so I finished sanding and then wiped
off the dust so I could paint. I laid out my drop-cloth and 
set out my paint. Conveniently enough, the brush was just a smidgen 
too big for the paint-can mouth, so I had to have a tray.
Instead of running out to buy one, I improvised and used the plastic,
albeit reusable tray from Hormel's Refrigerated Entrees.

Heck yeah, these are awesome.
And Jeremy scoffed at me when I emptied and then washed the tray
to reuse it. I knew it would come in handy for something. lol. It was perfect!
I painted the dresser and then the drawers. Then I put a second coat on.
Surprisingly, the paint we bought at Lowe's dries really quickly!
Valspar's with primer included. It's really awesome
and totally worth the extra bucks. A quart cost us about $14.
Luckily, that's all we needed for the dresser. 
                                                            *Note: The knobs we bought didn't fit...so we have to get new ones.

After I finished painting...and stepping in the paint,
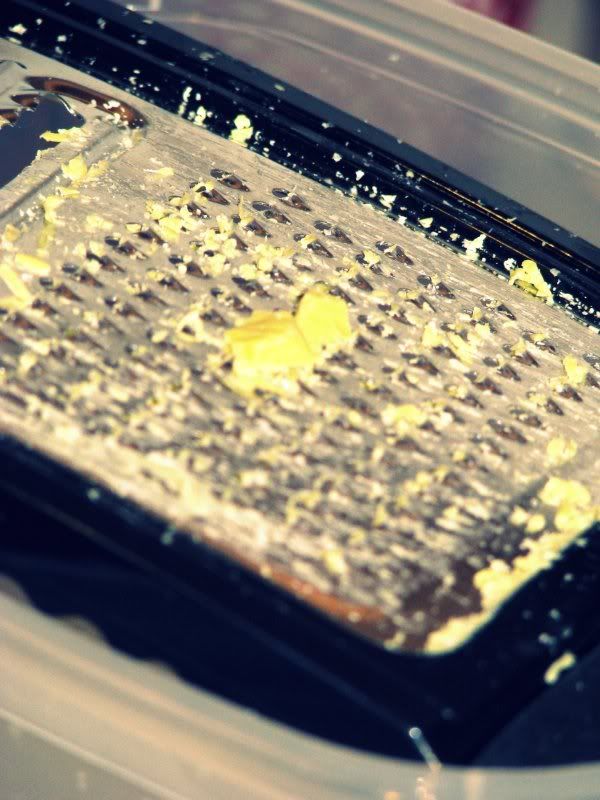
I started grating my block of Fels Naptha soap.
I grated all the way down to this tiny piece:

I may or may not have grated some of my nail...
so one of us quite possibly, may have a piece of nail
scratch us when we put on our clothes...
And a few Special K flakes may or may not have
been raked into the container when I was cleaning up 
spilled soap crumbles. Oh well. I forgot to clean the counter
this morning after making a bowl of cereal.

Anywho, so y'all can make your own homemade laundry detergent,
here are the ingredients and instructions:

1 bar of Fels Naptha soap, shaved (97¢/bar)
2 C of Borax($2.98 for 4lb. 12 oz. box)
2 C of Arm and Hammer Soda Wash (not to be confused with baking soda) 
($2.77 for 3lb. 7 oz. box)
(That's $6.72 for all the supplies!)

I really like the way the soap smells. I think there is another
recipe out there that calls for Ivory, but Ivory makes my skin itchy
and dry, so I'm using Fels Naptha instead. If you want to use the Ivory bar
of soap, you may have to use more, since the bar is smaller.

When you wash laundry, you only use 1-3 Tbsp. depending on how
large your load is and how dirty they are. Regular detergents bubble up,
but this does NOT, so don't just keep adding the stuff. Bubbles
don't necessarily mean your clothes will be clean!!

I'm storing mine in a plastic container I bought at The Dollar Tree.
A buck for storage? Sure!!!

I'll letcha know how the detergent works out! And I'll post pics of 
the finished dresser when I have the knobs. :) 

Hope y'all have a great weekend!
Happy Mil-Spouse Appreciation Day!

09 February 2011

Wooden Picture Frame Makeover

I was feeling a little sluggish yesterday, but had promised myself that I was going to do something with all the stuff I have been buying. So here is a short tutorial with horrible pictures.  {I need an assistant to help me take pictures. The lighting is horrible in the room I craft in and so this is what you get.}
{I got these cute XOXOs at Hobby Lobby for $2 each. Cute huh?}
Supplies I used:
1. wooden frame (from Michael's)
2. felt in any colors you like
3. red paint, white paint
4. small paint brush and sponge brush and 
something to put paint in.
5. thread to match felt
6. pins to hold roses together before sewing
7. glue-gun
First I painted the frame red, using the sponge brush.
(I started the project several days in advance 
before I started taking pictures. So, the paint had a lot 
of time to dry.) Don't forget the sides of the frame!
Also, I painted the stand on the  back. Don't forget it   
if you used the same kind of frame I did. I used a 
clothespin to hold it, so I wouldn't get paint
all over my hands. {I did anyway.} You don't
have to necessarily paint the part under the 
clothespin, since it will be inside the peg-hole.

After the red paint dries, mix your white
with water to make it go on more smoothly. Then,
using quick strokes, brush the white on with your 
small brush, to make the frame look weathered. 
{Around the edges and on the inside edge where the frame
would get the most wear.} If you mess up, you can
just cover it up with another coat of red.

While the paint is drying, you can make your
roses. Cut your felt into a strip about 6 inches long
and 1-2 inches wide. Depending on how large you want
the rose to be. Then fold your felt strip in half
lengthwise. (hotdog style!)
Start at one end and roll the felt around into a coil.
On the larger roses, you can twist the felt 
periodically to make extra petals.
 When you get to the end, use a pin to hold 
the rose together in a few places. Then, thread 
your needle with the thread that matches the 
felt the best.
{I doubled my thread to make sure it didn't break
through the felt easily when tugged.}
 After pushing the needle through the rose
a few times in different locations, tie off
the end of your thread and remove the pins.
Your rose is done! 

After making several roses {if you plan to use more
than one.}, your paint should be dried. Using your
glue-gun, attach the roses in one corner of the frame.

Your frame is done! {Be sure to attach the dowel
in the back to help it stand up.} Stick in a picture
and add it to your Valentine's Day decorations! 

{If you have any questions about this project
or anything else, feel free to email me!}

While making this frame, I had a little helper 
come to visit. You might recognize her as The Princess.
 

03 February 2011

Cardboard Picture-frame Makeover

 Since Valentine's Day is just around the corner,
and I had a few cardboard picture-frames lying around,
I thought I would makeover one for V-day. 
(holy run-on sentence Batman!)

The supplies I used:  
  • Cardboard picture frame with heart cut-out 
  • scrapbook paper 
  • seam-binding lace (or whatever lace you might have on hand)
  • tacky glue
  • Zots
  • Hot-glue gun
  • Scissors (duh)
  • X-Acto Knife 
First, I tried to take out the insert from
the picture frame so I could see how big the inner
picture was, and the cheap thing fell apart!
 
(Good thing too; there's no way I could
have done it with the back on it.)
 
After the frame was apart, I flipped my scrapbook
paper over to the back, laid the frame front on it, 
and traced around the frame and inside the heart.
Then, I cut out about 1/2-in around the trace of
the frame.
Next, I cut an 'X' from one side of the heart
to the other and cut up the inside into 1/2-in
"flaps"--to be folded into the frame.

I placed the frame on top and folded the pieces
inward and glued them down using the tacky glue.
Then, I glued the outer edges of the paper.
The next thing I did, I can't show you... LOL.
I had to hold the frame and the lace at the same time,
so I couldn't take pics.

I took my X-Acto knife and cut my 
Zots (sticky circles used to adhere
pictures/paper) into smaller pieces. Then I 
stuck one small piece just on the inside edge of the
heart. I overlapped the lace, using my nail
to push it into the Zot. Then I moved on about
1/4 inch and placed another Zot and overlapped
the lace the other way; creating a ruffled effect.
I continued doing this until I reached my starting point.
Then, using the hot-glue gun, I put a tiny bead in
a few places on the outside of the heart, to make 
the lace lay down.
After letting the paper on the back dry some,
I super-glued around the bottom and the two sides
to attach the front to the back. (This frame
also had a piece of string attached between the front 
and back, to hold the "leg-thing" up in the back. Yes
that is the technical term that I'm using...)

Here is the finished product with a picture of 
"The Princess", my niece.

I hope y'all like this. :) I think it is super-cute
and can be used not only for Valentine's Day,
but all year long. Especially since I put
this sweet picture in it!
Don't you love the frame on the right too? I got 
it at TJ Maxx for $4.00. I made the heart inside
out of felt, which I sewed on in a zig-zag
pattern. (It didn't turn out the way I had planned,
but that was the first time using my sewing machine.)
 
************************
 
Also, you may have noticed my glue-gun:
 I'm sure all you crafters out there have heard
of  Hot Glue Gun Helpers. I would love to have one, 
but since I don't have much money for
stuff like that, I had to improvise. That CD you see
is actually one of those old AOL discs everyone
used to get in the mail that offered free hours
of AOL. I knew keeping it would come in handy! :)
Sweet Home Alabama
Lilypie Pregnancy tickers

Sabrina

PitaPata Dog tickers

Tobias

PitaPata Cat tickers

Reba

PitaPata Dog tickers